Discover a dessert that melts hearts!
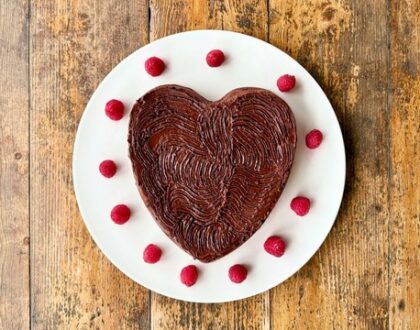
If you’re anything like me, you believe that chocolate has a special power—at least to solve almost any problem when it melts in your mouth. And, as an Italian who believes that mascarpone cheese makes everything better, you’ll understand why my Mascarpone Chocolate Ganache Cake is the ultimate indulgence—a dessert that melts hearts and makes someone fall in love at first bite!
The combination of mascarpone’s silky magic with dark chocolate creates an incredibly soft and velvety texture that perfectly complements the deep, intense flavor of chocolate. The method is simple but delivers a luxurious and elegant result. Plus, it’s naturally gluten-free, making it a treat everyone can savor without compromise.
So, whether you’re looking for a gluten-free chocolate cake recipe, a simple chocolate cake recipe, or an authentic Italian dessert, this cake is the perfect place to start. Prepare to fall in love with it!
For the Chocolate Mascarpone Cake:
- 200 g / 7 oz dark chocolate, 65–70% cacao
- 4 tablespoons heavy cream
- 250 g / 8.8 oz mascarpone cheese, room temperature
- 50 g / 1.8 oz / ⅓ cup + 1 tablespoon sugar
- 20 g / 0.7 oz /3 tablespoons cocoa powder
- 50 g / 1.8oz cornstarch
- 4 eggs, whites and yolks separated
- A pinch of salt
- 1 teaspoon baking powder
- 1/2 tablespoon butter, for greasing the pan
For the Chocolate Ganache:
- 100 g / 3.5 oz dark chocolate, finely chopped
- 50 g / 1.8 oz unsalted butter
Tools to have on hand:
- Knife
- Small pot or double boiler
- Large bowl (2)
- Electric hand mixer or a
- stand mixer fitted with a whisk attachment
- Whisk
- Rubber spatula
- Medium bowl
- Sifter
- Spoon
- 20 cm (8-inch) cake pan
- Serving plate
Ingredient Notes:
Dark Chocolate: Use high-quality dark chocolate with 65–70% cacao content for a balanced richness. The intensity of the chocolate significantly impacts the final taste of the cake. Avoid using milk chocolate, as it will alter the deep, rich flavor.
Mascarpone Cheese: Mascarpone adds a creamy, slightly tangy touch that enhances the texture of the cake. Ensure it is at room temperature before mixing to achieve a smooth batter.
Mascarpone Chocolate Ganache Cake (Gluten-Free!)
Equipment
- Knife
- Small pot or double boiler
- Large bowl (2)
- Electric hand mixer or a
- stand mixer fitted with a whisk attachment
- Whisk
- Medium bowl
- Spoon
- 20 cm (8-inch) cake pan
- Serving plate
Ingredients
For the Chocolate Mascarpone Cake:
- 200 g dark chocolate - 65–70% cacao
- 4 tablespoons heavy cream
- 250 g mascarpone cheese - room temperature
- 50 g sugar - ⅓ cup + 1 tablespoon
- 20 g cocoa powder - 3 tablespoons
- 50 g cornstarch
- 4 eggs - whites and yolks separated
- A pinch of salt
- 1 teaspoon baking powder
- ½ tablespoon butter - for greasing the pan
For the Chocolate Ganache:
- 100 g dark chocolate - finely chopped
- 50 g unsalted butter
Instructions
Prepare the chocolate mixture
- Preheat the oven to 160°C (320°F), fan-assisted. 180°C (350°F), without fan-assisted.
- With a knife, finely chop the dark chocolate into small pieces.
- In a small pot or double boiler, add the heavy cream and the chopped chocolate. Turn the heat to low and mix constantly until chocolate is dissolved into a smooth, lump-free mixture. Turn off the heat and set aside.
Prepare the egg yolks
- In a bowl, use an electric hand mixer or a whisk to beat the sugar with the egg yolks. Mix until the mixture becomes dense, fluffy, pale yellow. Start at a low speed and then increase the speed toward the end to medium speed. Scape the sides of the bowl with a rubber spatula to incorporate all of the sugar. This will create a zabaione-like consistency.
Prepare the egg whites
- In a clean, dry bowl, with an electric hand mixer or a stand mixer fitted with a whisk attachment add the egg whites. Start beating at a low speed until they become foamy and some air is incorporated. Add a pinch of salt, increasing the speed from low to medium. Continue beating until stiff peaks form.TIP: The egg whites are ready when you can turn the bowl upside down without them moving or falling out.
- Once the egg whites are stiff, refrigerate them until you’re ready to fold them into the mixture.
Prepare the cake batter
- In a large mixing bowl, beat the mascarpone until creamy using an electric hand mixer on low speed or a whisk. Gradually add the melted chocolate and mix until well combined.
- Add the egg yolk mixture and gently fold it using a whisk.
- With a sifter, add cornstarch and the cocoa powder and mix well until the batter is smooth and homogeneous. Add the baking powder, always using a sifter to avoid lumps, and mix well.
- Finally, fold in the beaten egg whites to the mascarpone-chocolate mixture, one spoonful at a time, using a gentle bottom-to-top motion.
Bake the cake
- Preheat the oven to 180°C (360°F). For my cake, I use convection baking because I want to achieve that perfect soft, creamy center. The circulating hot air helps the outside cook faster and set nicely, while the center stays delicate and velvety. This method creates a beautiful contrast: a slightly firmer outer layer with a rich, melt-in-your-mouth middle.See FAQ below for baking temperature for convection and regular oven.
- Grease a 20 cm (8-inch) cake pan with butter.
- Pour the batter into the prepared pan and smooth the top with a spatula, tilting the cake pan on one side and then the other to spread the batter around for an even surface.
- Bake the cake in the lower half of the oven for approximately 22 to 25 minutes or until the edges are set but the center remains slightly soft.
- The cake is done when inserting a knife in the center, it should come out slightly ‘dirty’, with a few moist crumbs clinging to it. This indicates that the cake is fully cooked but still retains some moisture, resulting in a tender texture.TIP: Avoid over-baking. The line between an over-baked dry cake and a perfectly baked moist cake is very thin, so keep an eye on it. The final texture of the cake should be dense, moist, and fudgy, with a slightly firm outer crust and a soft, tender crumb.
- Let the cake cool in the pan before unmolding for about 10 minutes.
Prepare the chocolate ganache
- In a small pot, add the butter and the chocolate. Turn the heat on low and mix constantly until the chocolate is dissolved.
- Mix and turn the heat off once all the mixture is melted. Let the ganache cool slightly until it thickens but remains pourable.
Serving the cake
- Remove the cake from the pan, inverting it onto the serving plate with the bottom up. Having the bottom of the cake up will hide the eventual imperfections on the top side.
- Pour the chocolate ganache, ensuring your cake is fully covered. Use a spatula to spread and smooth the ganache for a nice finish.
- Garnish with fresh berries for a decorative touch. For more decoration ideas, see the recipe notes. Serve and enjoy!
Notes
- Make sure the ganache has a medium consistency—not too runny or too firm—so that it holds patterns well. If the ganache becomes too soft, chill the cake in the refrigerator for a few minutes to firm it up before continuing.
- Hold the fork at a slight angle, and gently press the tines into the ganache, digging slightly into it. Drag the fork to create the effect you desire: swirling, horizontal line pattern, criss-cross or grid-like design. Have fun experimenting and give your cake a unique, elegant touch!
- Replace mascarpone with ricotta cheese for a healthier version.
- Store the cake in an airtight container at room temperature for up to 2 days or refrigerate for up to 5 days.
- Bring to room temperature before serving for the best texture.
- Bake the cake a day ahead and store it covered in the fridge. Add the chocolate ganache just before serving for a freshly finished look.
FAQ About Mascarpone Chocolate Ganache Cake (Gluten Free)
What makes this cake gluten-free?
This recipe uses cornstarch instead of wheat flour. You can also use gluten free flour or potato starch for the same result.
Can I use milk chocolate instead of dark chocolate?
While this recipe is best with dark chocolate (65-70% cacao) for its rich flavor, you can substitute milk chocolate. However, be aware that it will result in a sweeter, less intense chocolate flavor. We recommend sticking with dark chocolate for the ultimate indulgence.
Can I use Ricotta cheese instead of mascarpone cheese?
If you’d like to skip the mascarpone for a healthier cake, ricotta is an excellent alternative, although the texture and flavor will be slightly different. Mascarpone has a higher fat content, resulting in a richer, creamier cake. Ricotta will create a lighter, slightly less decadent cake.
Can I reduce or increase the amount of sugar in this recipe?
I’m always using very not much sugar in my dessert, so you can find the amount that suits your taste. Remember that sugar, besides making desserts sweet, helps keep the cake moist and tender, so reducing the amount significantly may result in a slightly drier cake.
How to make a perfectly smooth batter?
Before using the mascarpone, bring it to room temperature and beat it at low speed for 2-3 minutes until creamy. This step makes the mascarpone creamier before you add the egg yolk mixture. Since mascarpone is usually quite firm when you take it from the container, beating it helps prevent lumps and gives a smoother consistency. Be careful not to over-whip, as this can cause the fat and liquid to separate. When folding, slide the spoon down one side of the bowl, lift the mixture, and gently bring it over the top. Also, sifting the cornstarch and cocoa powder ensures there are no lumps, which helps to create a smoother batter and a more even texture in the baked cake.
Why using butter for the ganache?
Making the ganache with butter makes the ganache glossier and smoother. The ganache will set up more quickly and firmly, as butter has less water content than heavy cream or milk.
What’s the difference when baking with convection bake vs. regular bake?
When baking, the main difference between convection and regular ovens is how the heat is distributed. Regular ovens rely on heating elements at the top and bottom, while convection ovens have a fan that circulates hot air, ensuring more even cooking and faster results.
Convection ovens (fan-assisted) circulate hot air, resulting in more even heat distribution and faster cooking. Regular ovens use heating elements placed on top and the bottom of the oven.
- Convection Oven (Fan-Assisted): Generally it cooks food faster and more evenly, thanks to the circulating air. In a convection oven, you can typically bake on multiple racks without needing to rotate. The dry air from convection is good for creating crusts and browning.
- Regular Oven (Non-Fan-Assisted): This is a slower cooking method, more gentle heat that help cakes retain. It’s often preferred for delicate desserts. May require rotating pans for even baking.
Should I adjust the baking time or temperature if using a convection oven?
Yes! Since convection ovens cook faster, it’s best to:
- Lower the temperature by 25°F (15°C) from what the recipe suggests.
- Check for doneness about 20-25% earlier than the original baking time.
Here’s a fun story!
When I was a teenager, I was the only girl in a class of 29 boys. I had so much fun, but boys sometimes have their own jokes—often not too romantic! This was their take on Valentine’s Day:
“Valentine’s Day is the fool’s day,
He thinks he’s in love, but he’s been played!”
I hope you have enjoyed it!
Let's stay in touch!
Do not miss any news by subscribing to our newsletter. Sign up for updates about future classes, new recipes, trips to Tuscany, and much more.
Ciao! Welcome to Chicca’s Cooking Club Members Page. To have access to the video recipe library and upcoming...
Continue ReadingCiao! Welcome to Chicca’s Cooking Club Members Page. To have access to the video recipe library and upcoming...
Continue ReadingThis page requires a current Cooking Club subscription or Course purchase.
Continue ReadingCiao! Welcome to Chicca’s Cooking Club Members Page. To have access to the video recipe library and upcoming...
Continue Reading